



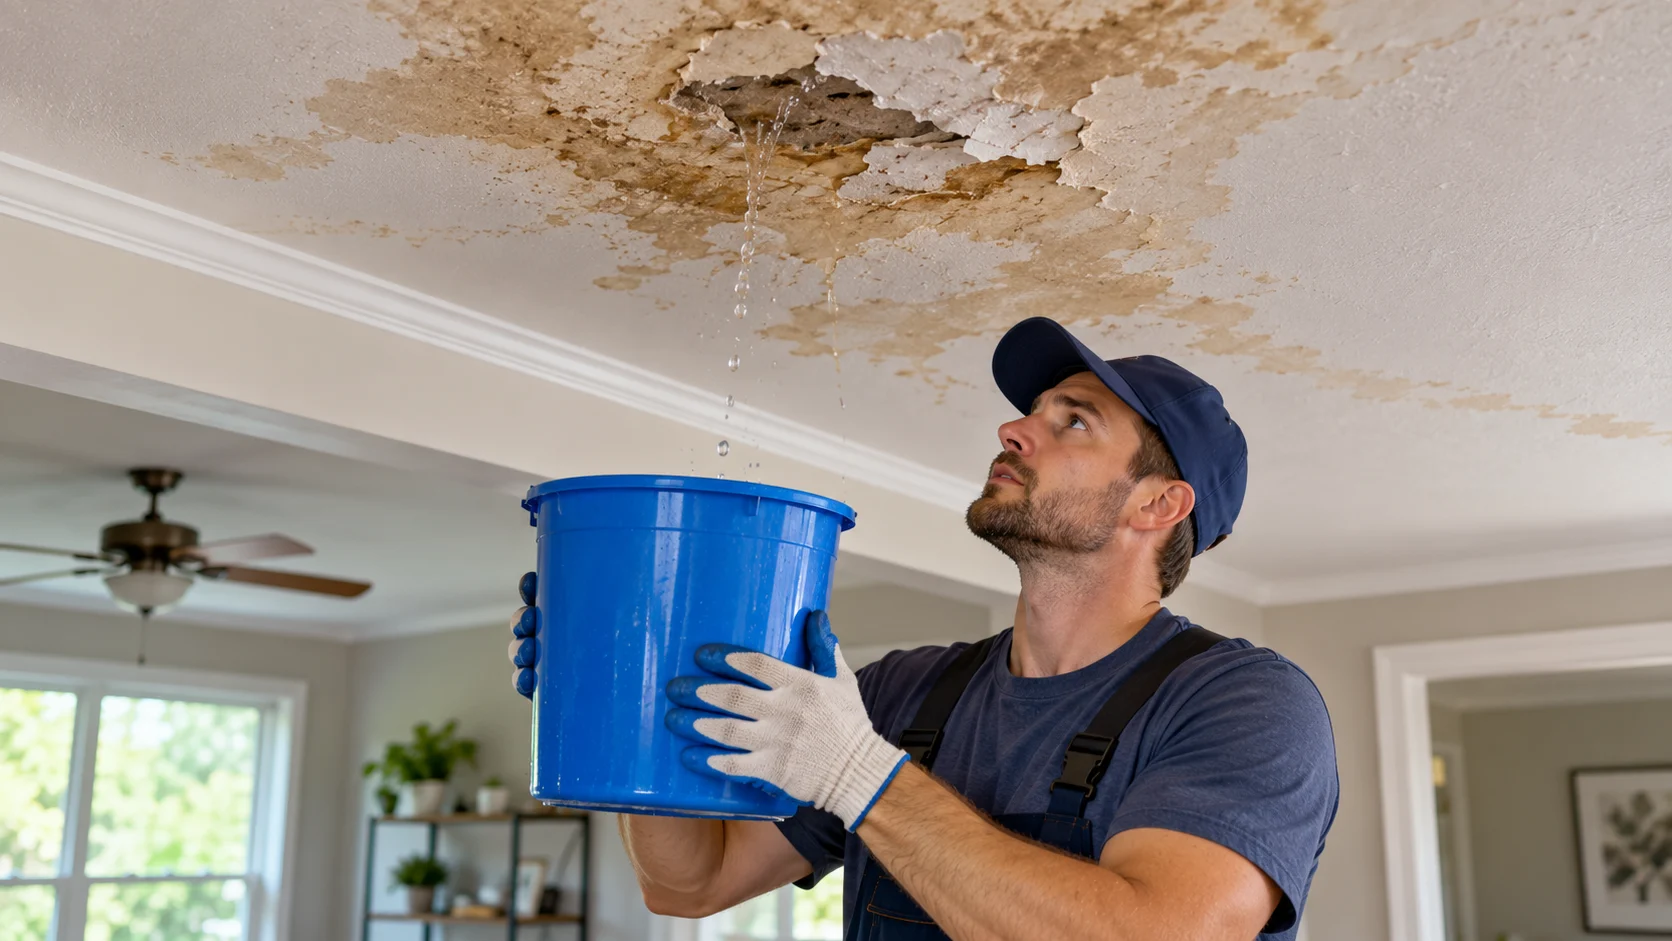
Safety always precedes any repair work done to a ceiling affected by water. Here are the top three issues that you should look out for and address before repairing or painting wet drywall:
- Make sure the electricity supply is cut off to prevent electrical shocks from wet wiring and lighting fixtures.
- Look out for water that could cause the wet drywall to fall on you due to its weight.
- Conduct asbestos testing if you have a textured or popcorn ceiling constructed prior to 1980.
Failure to deal with the water leakage issue or ignoring a wet ceiling will lead to recurring brown stains, paint peeling, and mold. Below is a list of checks, repairs, and replacements that should be done before working on the wet drywall, along with approximate repair costs.
Need a plumber first? Plumb Hero can find and repair hidden pipe leaks causing water damage behind your ceiling in Metro Atlanta.
Quick Answer:
To repair the leaking, water damaged ceiling repair, you have to shut down the electrical power in that room, mend the leaking part, get rid of the water that has made the ceiling swollen, and dry it to 16% moisture content for about 3 to 5 days. Only after that can you apply the primer.
4 Safety Checks Before Touching the Ceiling
Complete these 4 vital safety checks before starting your water damaged ceiling repair to prevent structural collapse or electrical hazards.
1. Cut Power to the Room
The lighting fixtures, fans, and junction box lie within the wet zone. The water follows along the electrical wires to reach all the way to other appliances far from the visible area.
Turn off the circuit breaker for that room in the main breaker box. You should not depend on a wall switch since it only turns off the appliance but leaves the wires energized in the ceiling. If you see any dripping water or sparks coming from the light fixture, turn off the main circuit breaker of the house.
2. Check for Ceiling Collapse Risk
Water-filled drywall becomes heavier than you might think. The bending of the drywall is evidence that there is water collecting on its surface.
Evacuate the room. Take all the furniture out of the way and do not stand beneath the sag.
3. Test Textured or Popcorn Ceilings First
The texture of ceilings and popcorn ceilings up until the mid-1980s might contain asbestos. Sanding or scraping the materials may cause the asbestos to go into the air.
Send the samples to a certified lab for analysis before doing anything to the substance. If there is asbestos in the ceiling, then stop working and contact an expert.
Aside from asbestos, lead-based paint is another substance that can be found in houses constructed prior to 1978.
4. Ventilate and Protect Yourself
Keep the windows open for ventilation purposes. While handling wet insulation material, wear an N95 mask, safety goggles, and gloves.
Draining a Bulging Ceiling Safely
Water accumulating in the ceiling bulge will inevitably lead to it breaking down. Draining should be done carefully and preferably under control.
If you have contaminated water (Category 3), then do not drain the bulge yourself. Call for professional help.
For clean water:
- Make sure that the room is not powered.
- Wear goggles and any other safety equipment needed.
- Place a bucket or tarp in the right place, which will be the lowest part of the bulge, to catch the water.
- Step to the side; never stand below the pressure.
- Make a small puncture hole at the lowest part using an awl or screwdriver.
- All the water should be drained into the bucket.
The process helps in making the structure light but does not solve the problem of the damp drywall.
Water Damage Categories: When DIY Is Unsafe
The classification of water in terms of restoration work is carried out according to IICRC S500. The class will indicate whether it is a do-it-yourself or a professional job.
| Category | Source | Handling |
|---|---|---|
| Category 1 (Clean) | Supply lines, water heaters, burst clean pipes | DIY-safe with basic PPE. |
| Category 2 (Gray) | Washing machine or dishwasher discharge, toilet overflow with urine only, HVAC condensate | Requires disinfection; DIY only for small areas. |
| Category 3 (Black) | Sewage backups, floodwater, toilet overflow containing waste | Professional remediation required. |
Two things that change the category:
Time. Categories deteriorate. Water that’s clean in the ceiling cavity may deteriorate to Category 2 in around 48 hours and to Category 3 thereafter. If the stain has been there for more than a week, you cannot treat it as clean water no matter how it was before.
Path. Water from the roof and deck is Category 1, but rainwater that has run through the ceiling to get to your roof and deck needs to be handled as Category 2.
The stain from an upstairs bathroom drain line should be Category 3.
Common Signs of Ceiling Water Damage
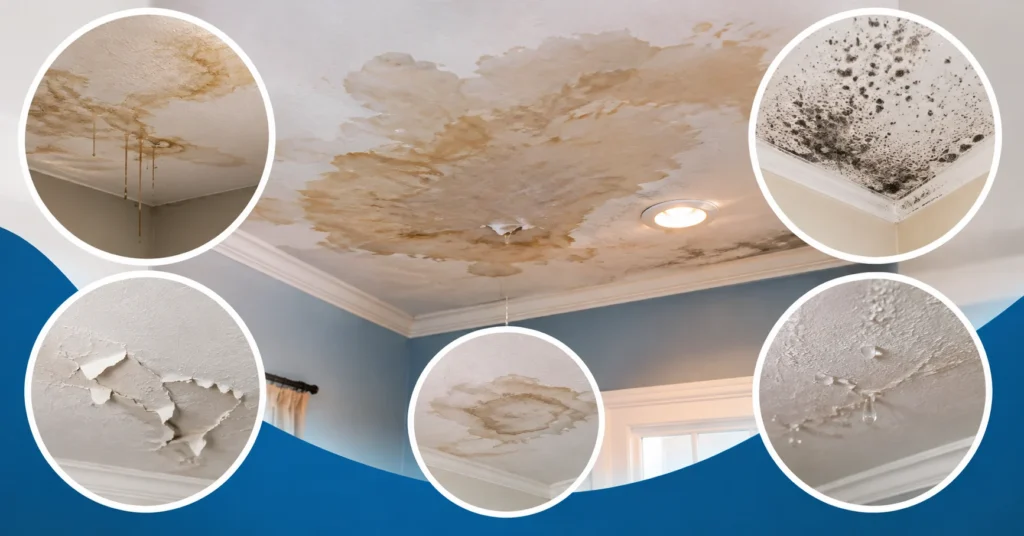
Brown or yellow rings: Brown or yellow circles. Water contains minerals that spread while drying to form concentric rings. More than one ring is a sign of more than one water event, not a single case.
Bubbling or blistering paint: Bubbles or blisters on the paint. The presence of moisture in the wall will break down the adhesion, causing the bubbles before staining occurs.
Soft or sagging drywall: Applying pressure to the surface will show whether the gypsum is still hard. If it yields to pressure, then the sheet needs replacement.
Musty odor: Mold growth can start in damp cavities after 24 to 72 hours. Odor usually comes before mold growth.
Recurring Stains: A brown water stain on ceiling surfaces bleeding back through newly painted surfaces means there is an active leak problem, or plain latex primer was used instead of a stain-blocking primer.
How to Find the Leak Source?
Never patch a ceiling until the leak source is eliminated. When the stain grows, it tells you where to look:
| Leak Symptom | Likely Source | Action Required |
|---|---|---|
| Stain expands after rainfall | Roof, flashing, or gutter blockages | Check roof structure, roof shingles, and valley flashing. |
| Stain grows during or after using the bathtub or shower. | Bathtub or shower fixture, tub wall, or drainpipe. | Check bathtub seals, shower pans, and drain connections. |
| Stain expands continuously, regardless of weather | Pressurized supply line | Run a water meter test; schedule leak detection. |
| Stain appears in summer near an attic air handler | HVAC condensate line | Clear the blocked drain line; inspect the overflow pan. |
How to Run a Water Meter Test
The fastest way to confirm a hidden supply line leak:
- Turn off every fixture and appliance that uses water, including ice makers and irrigation.
- Locate your water meter and note the reading, including the low-flow dial or leak triangle.
- Wait 30 to 60 minutes without using any water.
- Read the meter again.
If the reading moved at all, water is escaping somewhere in the pressurized system. If the leak appears to originate near the foundation or a lower level, see our guide to slab leak repairs, or contact a plumber about leak detection and water line services.
Should You DIY or Hire a Professional?
Decide whether to DIY or hire a pro for your water damaged ceiling repair by evaluating cost, safety risks, and the extent of the structural damage.
Do it yourself when:
- The water is Category 1 (clean).
- The affected area is under 10 square feet.
- The ceiling is not a textured or popcorn surface from before the mid-1980s.
- The framing above is sound and dry to the touch.
Hire a professional when:
- The water is Category 2 or 3.
- The damaged area exceeds 10 square feet, or visible mold is present.
- You observe a severely sagging ceiling, a water hazard, or rotted framing.
- The ceiling is textured and predates the mid-1980s.
- You are filing an insurance claim and need documented moisture logs.
How to Repair a Ceiling from Water Damage Step-by-Step
Once the ceiling is safe and the source is identified, the water damaged ceiling repair runs in this order.
1. Stop the leak
Shut off the main supply valve for plumbing leaks, tarp damaged roof sections, or clear blocked HVAC drain lines. Nothing else matters until this is done.
2. Document everything for insurance
Photograph the ceiling stain, sagging drywall, floor impact, and the failed pipe or roof area before removing any material. Keep the failed plumbing; component adjusters frequently ask for it.
3. Remove saturated drywall and insulation
Cut away damaged drywall at least 6 to 12 inches beyond the visible stain, back to the center of nearby joists. Drywall wicks moisture well past the discoloration. Remove all wet insulation; it holds moisture against the framing for weeks and will not recover in place.
4. Dry out the cavity to a proven measurement
This is the point where people try to take shortcuts, and that’s why their repairs fail. Place the dehumidifier in the room, and have the air movers blow into the open cavity. You will dry to a measurement, not a time frame. The framing needs to measure below 16 percent moisture, preferably 12 to 14 percent, using a moisture meter before sealing up the space.
5. Deal with surface mold
Clean the mold on your frame using an appropriate disinfectant. If the mold is bigger than 10 square feet, it is advisable to get help from professionals.
6. Patch and finish
You should see to it that the piece of wood you cut matches the thickness of the ceiling, which can be either 1/2 inch or 5/8 inch. After that, you can attach it to the ceiling joist and apply joint compound.
7. Prime with a stain-blocking primer
This is where most DIY repairs go wrong. Standard latex primer allows water-soluble tannins to bleed straight through within days. Use an oil-based or shellac-based stain-blocking primer over the repair and the surrounding stained area. Shellac-based blocks the toughest stains and dries in under an hour, but has a strong alcohol odor. Oil-based dries slower and cleans up with mineral spirits. Ventilate either way.
8. Paint the full ceiling
Paint edge to edge rather than spot painting. Ceiling paint fades over time, and a spot-painted repair stays visible as a bright rectangle.
Water Damaged Ceiling Repair Cost
Typical ranges for the cosmetic drywall portion of a ceiling water damage repair cost:
- DIY materials only: $50 – $150
- Minor professional patch and paint: $300 – $800
- Moderate drywall replacement: $800 – $2,500
Such estimates apply to the repairs that include patching the drywall, applying primer, and preparing the surface for painting. Repairing the underlying leakage issue caused by either plumbing or roof problems will be estimated separately.
Does Homeowners Insurance Cover Water Damaged Ceilings?
However, the insurance policy for your house will generally be able to handle all kinds of damages arising from sudden occurrences such as burst pipes, pipeline damage, as well as storm damage to your roof.
Policies generally exclude:
- Leaks that develop gradually without attention
- Damage caused by deferred maintenance
- Flooding from surface and groundwater, needing individual flood insurance
To protect your claim:
- Report your claim immediately.
- Take photos of the damage caused without moving anything.
- Save any faulty plumbing materials and receipts for rental equipment.
When to Call a Plumber Immediately?
Consult a licensed plumber for water damaged ceiling repair prior to any cosmetic work if:
- The spot continues to grow irrespective of climate or use of the shower.
- Your water meter runs while all fixtures in your home are turned off.
- The spot lies directly under an upstairs bathroom.
- Your water bill increased with no change in usage.
- You hear running water inside a wall or ceiling cavity.
Stop the Leak First; The Plumb Hero, Metro Atlanta
Plumb Hero is a private organization that provides plumbing services starting from Norcross, GA, where master plumbers are licensed for Gwinnett County and Metropolitan Atlanta, namely Duluth, Lawrenceville, Snellville, Loganville, Alpharetta, Buford, and Conyers.
We locate and stop plumbing leaks in your ceiling: bursting pipes, bad wax seals, leaky shower pans, and broken drain pipes. We do not provide drywall repair services, but we will stop the leak and let you know if you need a restorer to come in.
Call (470) 602-9246 or request service online today.
Frequently Asked Questions
Can I paint over a water stain on my ceiling?
When the hole has been fixed and the area is completely dry, apply the stain-blocking primer under the paint, which is either an oil-based or shellac-based primer. Paint can not be applied to a hole, and latex primer should not be used either, because it will result in staining.
Can water damaged drywall dry out, or does it need replacing?
Drywall that has been subjected to clean water for a relatively brief period of time can be dried out and saved. Drywall that is soft, sagging, damaged, stained, or has been subjected to water for over two days must be replaced. The drywall on ceilings is not as forgiving as that found on walls due to gravity.
How long does a water damaged ceiling take to dry?
The procedure normally takes between 3 and 5 days non-stop when using the dehumidifier and air mover, but will take longer if there is a lot of moisture in the air or if there is still wet insulation in place. It can also be determined using a moisture meter.
Does a water-stained ceiling always mean mold?
Not necessarily; however, mold can grow after 24 to 72 hours inside a damp hollow area. The presence of a musty smell or a damp stain existing for more than two days should require one to open up the ceiling.
Can a water damaged ceiling collapse?
Yes. Saturated drywall loses structural strength quickly, and a bulge holding pooled water can fail without warning. Clear the room and drain the bulge in a controlled way rather than waiting.
Conclusion
Water damaged ceiling repair involves a series of well-defined actions. To make sure that the ceiling repair is done successfully, these steps must be undertaken in the proper order: securing the area, repairing the leak, drying the area, priming the area with a stain-resistant primer, and painting the ceiling. If these steps are not properly completed, then the stain will reappear.
This is where The Plumb Hero shines. With the help of our highly skilled and licensed master plumbers, we find and repair the plumbing leaks that occur in ceilings, such as burst supply lines, leaking shower pans, and leaking drain pipes.
Fix the leak first before doing any repairs. Call The Plumb Hero at (470) 602-9246 or book an appointment.
